Caribou Country Chamomile Wine
Making your own wine at home can be either intimidating or lots of fun. I like to make wine and I like to have fun. Most of the recipes and instructions on the internet are intimidating AND confusing. And they try to convince you everything has to be perfect, and you have to use that floating thermometer thingydoodle to get your alcohol level just right. Here’s a secret. I can’t get my floating thermometer thingydoodle to even float, not even a little, it just drops like an ironclad and doesn’t tell me anything useful. *whispers* So I stopped using it completely.
What follows is how I make wine. I break lots of rules, but if you don’t try to bottle it up too soon, just let everything age nice and slow, you won’t have an incident in the middle of the night where multiple corks explode out of bottles and wine flows across your nice kitchen floor in fanciful effervescent waterfalls.
Not that I know anything about that. Er, it happened to a friend once. Yeah, that’s what happened. Anyway. NO CORKING TILL IT’S DONE BOUNCING AROUND, YOU GOT THAT? It’s no fun mopping up a foamy boozy mess, plus you have the sadness of less wine to drink later. Again – happened to a friend, I’m just remembering the story. As far as you know.
For the brave and foolish fun lovers out there, here’s my favorite wine recipe. I grow and dry my own German chamomile flowers, and always have heaps more than I need for tea. The German variety of the flower is very sweet and fragrant and makes a yummy wine!
Have fun, and remember what I said about corks and explosions. Patience, grasshopper.
Caribou Country Chamomile Wine
18 cups water
4 cups white granulated sugar
1/4 cup dried chamomile flowers
3 tsp acid blend
1 tsp yeast nutrient
1/8 tsp tannin
1 crushed Campden tablet
1 packet Montrachet wine yeast
Mix sugar and water in a really big pot (I use my small hot water bath canner) and bring to boil, stirring frequently to dissolve. Put chamomile flowers in a doubled square of cheesecloth and tie closed. Put the bag of flowers into the primary (the ‘primary’ is wine-speak for a large, very clean rigid plastic bucket with a fitted lid, designed specifically for winemaking).
When the sugar is dissolved and the water comes to boil, pour the sugar water into the primary, over the bag of chamomile flowers. Drip drain the flower bag several times to allow the flavor to seep into the water. Taste. If flavor is not strong enough, make another bag of flowers and toss it in. Cover the primary with its vented lid and let the mixture cool down to room temperature.
While you wait, you can measure out the acid blend, yeast nutrient, tannin and crush up a Campden tablet, blending it all together in a small dish. When the mixture in the primary has cooled to room temperature, dump all the science-y stuff in the small dish into the mixture, then stir till all is dissolved.
Every few hours gently squeeze the flower bag(s) to continue extracting their flavor. After 24 hours, remove the flower bags and discard them, then add the packet of Montrachet wine yeast. Cover the primary, and stir the mixture daily for a week.
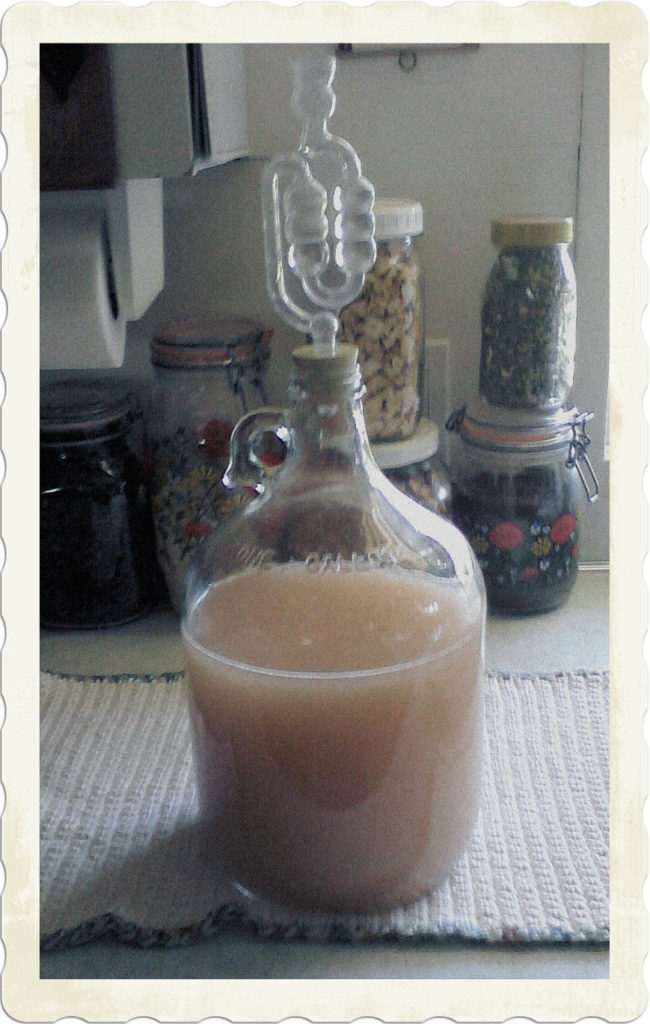
In about a week, or up to two weeks if you forget all about your gurgling bucket of fragrant boozy yeasty fun, as I often do, pour the wine slowly through a coffee filter set in a strainer set in a plastic pitcher. Stick a funnel into a 1-gallon glass jug and pour the strained wine into it. You’ll have too much for one jug, so you may want to use two and fill each one halfway. Use airlocks to vent the jugs. Ferment for a month. Your wine will probably look really nice and clear and sparkly, with a thick layer of dead yeasty sludge settled on the bottom of the jug. Yuck. If you’re able to carefully pour off the clear wine without riling the yeast layer, do that and put the clear wine in a fresh jug.
If it’s still not clear, pour the wine slowly through a coffee filter set in a strainer set in a plastic pitcher and attempt not to rile that yeasty-yuck layer. Leave it behind! Funnel the strained wine into fresh, clean 1-gallon jugs. Repeat this process every 2 months for 6 months (that’s three times for the math impaired like me). Let the wine rest for two weeks after the final straining, then funnel it into bottles and cork (you’ll need a corking machine, which are really fun to use. If you don’t have one, see if you can borrow one for the afternoon.) Lay the corked bottles on their sides and allow them to age in a dark place 6 months before tasting. Will improve with aging for about two years.
You can also store the finished wine in the 1-gallon jugs and skip the hassle of bottling and corking. I’ve started doing this, rather than bothering with corking bottles.
Cheers!
Lori Alden Holuta
Lori Alden Holuta lives between the cornfields of Mid-Michigan, where she grows vegetables and herbs when she’s not writing, editing, or playing games with a cat named Chives.
2 Comments
Amy
Your Recipe only calls for 18 cups of water and I don’t see where it says to add water to reach 5 or 6 gallons but then you say you will have too much to fill a 5 gallon carboy. Would you mind clarifying? I’m ready to start a batch. Thanks so much
Lori Alden Holuta
Oh my goodness, I have made a mistake! I use ONE gallon jugs, that’s what’s shown in the picture. I’m so sorry, and am fixing it right now. Incidentally, I usually double the recipe, and fill two 1-gallon jugs, plus some extra in a third jug. As time goes on and I strain off the yeasty sediment, I can use what’s in the third jug to top off the other two.